Adding Users
Users can be added by navigating to Administration > Users and selecting the Add button at the top of the page. This opens the Add User page, where you can customize a variety of settings for the individual user.
Once you have selected your settings, select the Save button at the top of the page. Your new user will appear in the list of users, with their name, email address and company group displayed (if they have been assigned to a group.) Once they have logged in, you will also be able to see their last login date.
For more information on selecting settings for your users, see Editing Users.
Removing Users
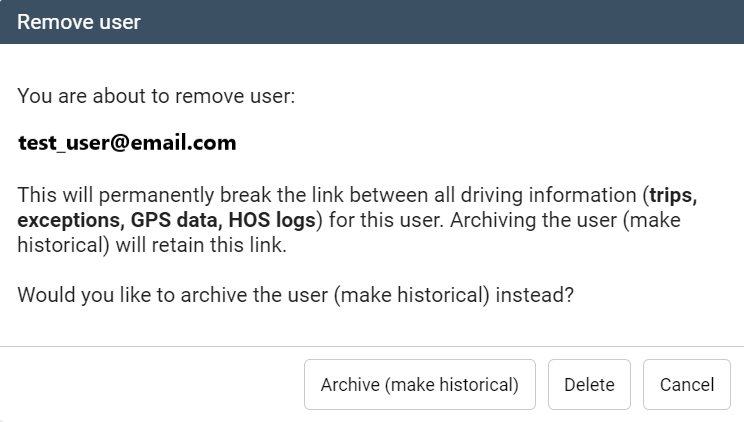
To remove a user, navigate to Administration > Users and select a user to remove. In the User Edit feature, select Remove from the top menu and confirm your selection.
You can retain a user’s data in the system while removing them from lists of users and reports by selecting Archive in the confirmation message box. You may consider using this option if you would like to retain the user’s data for future reporting purposes.
Editing Users
To edit an existing user, navigate to Administration from the main menu, and select Users from the submenu. Select a user to edit from the list.
The User Edit screen organizes user settings under five tabs:
- User: User/Employee settings and assigned groups;
- Driver: Driver ID settings;
- UI Settings: Set display options;
- Map Settings: Select map options;
- HOS Settings: Select HOS options;
- System Communications: Opt in to news and service notifications; and
- Support: Designate users as contact for your organization.
As an Administrator, you can opt in to receiving system notifications when user settings are changed. Notifications display the date on which changes were made and the properties that were changed.
Note: Individual users can configure these settings for themselves in the Options menu. If you do not want a user to be able to access these settings, you must set the appropriate security clearance for them. If none of the default clearances meet your needs, you can create a custom sub-clearance for your users and remove Change your own user options from the Access to feature list. For more information on how to set clearances and create sub-clearances, see Clearances.
User Settings
The User Settings tab configures basic profile information and access settings for individual users. Here, you can edit your user’s name, email address, designation, and employee number.
These settings also allow you to set a security clearance for your user and adjust their access to data. The Security clearance field is populated by the designations configured on the Clearances page (for more information on configuring clearances, see here.) This allows you to customize access to the application for individual users.
The Data access field is populated by your organization’s Groups. Assigning users to specific groups allows them to access the data they need while protecting data that should be kept private. For example, if your organization operates in multiple regions, you may want to use regional groups to prevent users from accessing data from regions other than their own. For more information on groups, see here.
Driver Settings
The Driver settings tab configures settings for users who are drivers. In order to configure these settings, you will first need to toggle This user is a driver to On at the top of the page. Once this option is selected, the remaining driver options will display below.
If you use driver keys to identify drivers in your fleet, you can add a driver key for the user under the Keys heading. You will be prompted to enter the type of key and its ID number before saving.
Toggling the Prevent driver access to shared data toggle to On will prevent the driver from having access to any data in the application that is not his or her own.
UI Settings
The UI Settings tab allows you to customize the application for users based on their regional and UI preferences. These preferences include:
-
- Measurement systems (Metric or Imperial)
- Fuel economy measurements, including electric energy measurements
- Date and time formats, including your user’s time zone
- Language
- Default page at start-up
- The ability to receive email reports
- The ability to view Feature Preview functions
Map Settings
The Map Settings tab configures the Map function for the user. Here, you can select the default map type displayed in the Map function, including the default map view (for example, some users may use the Roadmap view, while others may need the Terrain view.)
Any Map views the user has saved will also appear here in a ranked list in the View organizer field. The view at the top of the list will be the default view shown when the user opens the Map function. You can create new map views using the Views option in the Map menu. For more information, see here.
HOS Settings
The HOS Settings tab allows you to select different options for your user’s HOS ruleset if your user is a driver.
The Ruleset field allows you to select a ruleset for your driver from more than 50 options based on regional requirements. You can also specify the start time for your driver using the Start of day field below.
The Yard move allowed and Personal conveyance allowed buttons allow you to toggle these privileges on and off. When the privileges are toggled On, the driver will be able to apply these exemptions in the application.
The application also allows you to specify information such as the driver’s home terminal, the terminal address, and the driver’s carrier number if desired.
Support
The Support tab allows you to designate users in your database to act as contacts for support, training, and procurement questions. A user who is designated as a contact for one of these areas should be able to answer questions from your telematics providers on behalf of your organization.
To assign a user as a contact, toggle the appropriate contact category to Yes. Users can be assigned as contacts for questions about support, training, or procurement within your organization. A single user can also be a contact for more than one of these categories.
Note: User contacts must have a phone number associated with their account that can be used to reach them during normal business hours. If a user is selected as a contact, but does not have a phone number listed on their profile, you will be prompted to add one before leaving the Support tab. Phone numbers can be added under the User tab of the User Edit page.
Unlocking Users
Locked users are displayed with a red lock icon beside their name. Administrators answering the call from locked users can unlock them from the Users page.
To unlock a user:
-
- Click the locked user’s name to open the User Edit page.
Click the Unlock button on the top bar. A popup box will appear. Click Unlock to unlock the user or Cancel to return to the User Edit page.
Editing Multiple Users
If you want to make the same changes to a number of user accounts, you can use the dropdown list in the top right corner to select multiple users. The Select individual option allows you to select multiple individuals from the user list to edit. The Select visible option will select all users in the visible list to edit. You can refine your user list using the search box in the top menu.
Select the Edit multiple users button in the top menu to open the Edit multiple page where you can modify all selected users. The user count will be displayed in the page title, and a popup will appear at the top of the page reminding you that you have multiple users selected.
Clearances
Security clearances control a user’s access to specific features of the application.
Security clearances are assigned to users in the User Edit feature, but managed using the Security Clearances page. To assign a security clearance to a user account, navigate to Administration > Users and select one or more users to edit. Under the User tab, use the Security Clearance dropdown menu to select the appropriate clearance for your user.
If you would like to modify existing security clearances or add a custom clearance, select the Clearances button from the Users page.
The application defines the following security clearances by default. If the default clearances do not meet your requirements, you can create customized sub-clearances as follows:
-
- Select an existing security clearance.
- Select the Add Sub-Clearance button.
- Modify access to individual features by selecting the check mark or the cross button.
- Name the sub-clearance.
- Select Save.
Note: Sub-clearances must be assigned to users before they can take effect.
Marketplace Clearances
By default, users will see all available marketplace applications. These include both free and paid applications, as well as applications developed by third-party vendors. Administrators can customize the types of applications visible to the user as follows:
|
Show/hide third-party applications |
|
|
Show/hide paid applications |
|
|
Show/hide Marketplace entirely |
|
Comments
Please sign in to leave a comment.